|
 |
|
|

Administrator
1266 posts
Registered:
Jan 2006
never argue with an idiot. they'll bring you back to their level and then beat you with experience.
Administrator
1266 posts
Registered:
Jan 2006
Welcome to Tricks&Tips #1! This will be about convert yourself (and your config) to the EXCELLENT nQuake. It's the bestest way ever to play Quakeworld online. After losing a match have you ever wondered if your config had something to do with your poor performance? If you play Quake for a long time, im sure you do. All these years, tweaking your config, saving settings you no longer remember, how can you be sure if your config isn't holding you back? And what if you have inherited someone else's config? The only thing to do is start fresh. If you haven't done it already, download nQuake now. It is the result of years of evolution, and it's config is very close to perfection. With nQuake you have several new alias available, such as crosshairs, bots, spectator, volume, graphics as well as the better values for all commands. Don't forget to read the readme.txt. If you're ready to embrace nQuake's config, this is a Guide to convert your current config to the new nQuake configDisclaimer: The new config will be much thinner than your current config. It *will* need some tweaks after the procedure is complete. But it's the only way to really start fresh. If you simply load your old config to the new nQuake folder you are cheating  - Backup your current config.
- Download nQuake.
- You have to run nquake one time, so the config is generated. The config is saved in nQuake\ezquake\configs folder.
note: nQuake's default config is always available and it's called default.cfg.
optional: Download a better text editor. Notepad++ or UltraEdit - Open in the text editor your current config and the nQuake config (new).
- optional: Copy all the aliases of your current config and paste them to the new config.
- Manually review all the binds of the new config. Compare them with your old config and do the necessary changes to the new one.
- Almost done: Load nQuake with your new config. Some settings might be missing, you got to set them up. This is your main config now. Use the nQuake aliases to customize your graphics/crosshair. Progressively adjust the new config to your liking. This will take time. You can use Phil's config comparer to check which settings you miss from the old config. Don't forget to cfg_save.
- optional: If you have custom model, textures or hud icons that you want to use, simply copy them to their respective folders under the new nQuake folder.
- optional: if you like your old HUD better, shame on you. But you can export it and use it. Load your old Quake, type hud_export (only works in ezQuake afaik) and exit. The file with the hud sttings will be saved in oldQuake/ezquake/configs. Copy the file to nQuake/qw folder. Run nQuake and exec the file. cfg_save and it's done. You can also use the hud_editor to customize it.
- Done! You have now a better config!
If you aren't ready to give up on your config but want to compare it to nQuake one, use Phil's config comparer. Maybe you will find some settings you want to change...
Congratulations! All that you need now is a good teamplay config.
Next T&T will be about Teamplay configs!
Do you think this description is too basic? Or it's fine? You got any tips of your own? Comment!
Back to T&T index
never argue with an idiot. they'll bring you back to their level and then beat you with experience.
Administrator
1266 posts
Registered:
Jan 2006
In this T&T the topic is teamplay messages. We will not discuss tactics or teamplay, just the team messages. You probably already have some teamplay aliases that you use, but you may want to consider using the ones we will talk about. If you don't have, use these. They're very easy to set up. And are the best teamplay aliases I've ever came across. Credits at the end, they're based on the famous TVS teamplay script. Before the aliases themselves, some basics: - some messages are more important than others. If you don't use messages often, start with a couple of them. Then, as you get used to click those keys, progressively start using more. Don't feel "forced" to use them - it shouldn't affect your gameplay. Report your position is by far the most important one. Choose a handy key for that one and keep pressing it.
- It's no use to spam your teammates with messages. Use the say_team messages wisely.
- Get used to read your teammates messages. If everyone uses similar messages to report a situation, the message becomes clear with just a glance, there's no need to read *everything*.
Now, the teamplay messages. Get them here. Place them in nQuake/qw folder. There are 2 files: - tp_binds.cfg - contains the binds. You have to edit this file.
- tp_aliases.cfg - contains the aliases. You don't need to edit this one.
Edit tp_binds.cfg. Read the instructions. Next I will describe step-by-step what you need to do: First, you have to set your nickname (variables nick and nick2) with 4 characters. set nick2 "{&c037nick:&r}" // change this
set nick "nick:" // remember to add space before 3 letters if needed
Then you have to set the binds to the keys you want. Note that some aliases have multiple meanings, depending on your situation (for example _report). Replace "x" with the key you want for each alias: // Essential tp binds, in order of importance:
bind x "_report"
bind x "_lost"
bind x ".team_powerups"
bind x "_enemy_powerups"
(...)
There are many binds. You may not want to use them all. The ones you don't use, add double slash " //" in the beginning of the line. This will comment the line. Like this: // bind x "_packleft"
Almost there. Just one more thing. The last piece of the file regards the optional binds: // Optional binds, check tp_aliases.cfg for positions
bind x "_enemy_pos1"
bind x "_enemy_pos2"
bind x "_enemy_pos3"
bind x "_enemy_pos4"
I recommend setting these to the arrow keys of your keyboard (UPARROW DOWNARROW LEFTARROW RIGHTARROW). Like this: bind UPARROW "_enemy_pos1"
bind DOWNARROW "_enemy_pos2"
bind LEFTARROW "_enemy_pos3"
bind RIGHTARROW "_enemy_pos4"
Save the file.Load nQuake and type in the console: exec tp_binds.cfg The keys you chose are now bound to the teamplay aliases. Check if everything is ok. Don't forget to cfg_save. Done. Some thoughts:- After executing tp_binds.cfg the aliases are loaded in your config everytime, so you can bind them to keys later. For example, typing bind q "_slipped" in the console will use the stored alias _slipped..
- If you want to know which aliases you can bind, you can list the aliases using the command aliaslist in the console. Example aliaslist _* will list all aliases that start with _ (underscore).
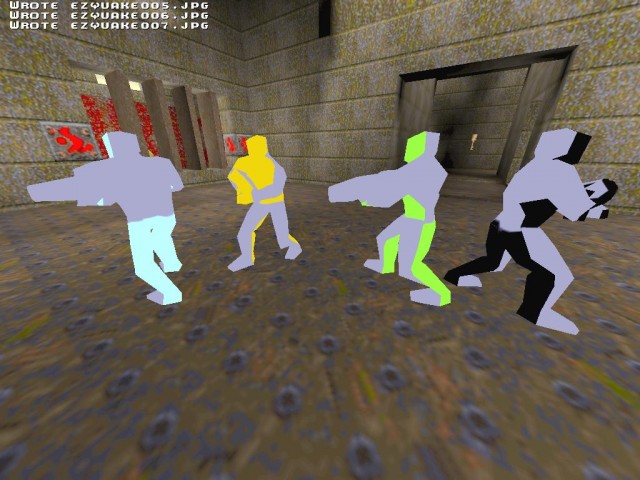
Credits for amazing teamplay config:Xantom - I couldn't contact him to ask permission to pos the cfg. BlazeDarffI have slightly changed some descriptions. BONUS TIPIt's possible to setup a different skin for every teammate. Typing teamforceskins 3 in the console will make your teammates look like this: If you have doubts/suggestions, post them in the comments! Back to T&T indexnever argue with an idiot. they'll bring you back to their level and then beat you with experience.
Administrator
1266 posts
Registered:
Jan 2006
Different players use different keys to do the same thing. Many players choose weapon with a key, then fire with mouse button 1 (mouse1). Others have a different key to fire different weapons. Some fire with SPACE, others with mouse buttons. It's a matter of taste. As everyone, I have my own way of firing weapons in QuakeWorld. IMO, my way of firing is the ultimate friendly way of firing (cof cof - /modesty). I use the 5 mouse buttons to fire all weapons. Mouse1 fires RL, Mouse2 fires LG, Mouse3 SNG/SSG, Mouse4 fires GL, Mouse5 is +jump;+fire for rocketjumps, and the mouse wheels fire either SSG or SG (for long distance shots). It's perfect. On my right hand fingers i have all the possibilities of firing. Every situation requires evaluation "which weapon is the best for this?". You have to question yourself that every second. With my cfg, execution is simple. You just have to decide which finger you are going to move. Here's my simple script://Shoot with mouse buttons (5 buttons + mouse wheel)
bind MOUSE1 "+rl"
bind MOUSE2 "+lg"
bind MOUSE3 "+sng"
bind MOUSE4 "+gl"
bind MOUSE5 "+rjump"
bind MWHEELUP "+sg"
bind MWHEELDOWN "+ssg"
echo ^all-mouse-fire script loaded."
Note: Those alias (+rl, +lg, ...) are already in nQuake. That does the trick. Simple, effective firing script for all situations. What if I want to improve that? Luckly, Quake offers rather complex scripting capabilities. If you ask any Quake player about what they love in Quake, many will answer advanced scripting straight away. Because it enables you to do virtually anything in the game. Today's teamplay scripts are an example of that. This is one of the things that Quake has that no other game offers. In the next lines I will show some of these scripting features. Ok. What if I want a different sensitivity for LG only?There's a bunch of ways of doing that. Open your config and look to the current +lg alias. It should look something like this: alias +lg "weapon 8 5 3 2 4 1;+attack"
alias -lg "-attack"
Add the sensitivity you want there: alias +lg "weapon 8 5 3 2 4 1;+attack; sensitivity 1.6"
alias -lg "-attack; sensitivity 2"
Hmmm. This is no good. That way, everytime I want to change sensitivity i have change my config manually. Shit. What if we do some math with the sensitivity value, apply new sensitivity while i'm shooting LG and then restore the "old" sensitivity back? Perfect: alias +lg "weapon 8 5 3 2 4 1;+attack;set_calc sensitivity $sensitivity * 0.8"
alias -lg "-attack; set_calc sensitivity $sensitivity / 0.8"
Ahh. Now it's automatic. I can change sensitivity in game all the time and it will reduce its value. With that example, while i'm shooting the LG my sensitivity lowers to 80% of the normal sensitivity. So its a 20% reduction. Sounds good - we don't want to reduce alot. But the alias looks complex. We can do better. Lets separate that bit we added into a new alias: alias +lg "weapon 8 5 3 2 4 1;+attack; lowsens"
alias -lg "-attack; normalsens"
alias lowsens "set_calc sensitivity $sensitivity * 0.8"
alias normalsens "set_calc sensitivity $sensitivity / 0.8"
Now the sensitivity logic is separated and can be used in other situations as well, such as the +zoom alias for instance. But that 1.4 is still a fixed value. We can convert it to a variable, and then we can change it on the console. That means, no need to edit the config: alias +lg "weapon 8 5 3 2 4 1;+attack; lowsens"
alias -lg "-attack; normalsens"
set sensfactor "0.80"
alias lowsens "set_calc sensitivity $sensitivity * $sensfactor"
alias normalsens "set_calc sensitivity $sensitivity / $sensfactor"
Ah, done. Fully automatic sensitivity for the weapons I want. If i change my sensitivity, it will automatically reduce whatever value sensitivity has. If you want to change the sensitivity factor just write in the console:set sensfactor "0.75" Value 0.75 will reduce your sensitivity to 3/4 when firing lg. Value 0.5 will reduce your sensitivity to half when firing lg. etc.. It's simple math. And it will fully work. So about the sensitivity we are done. What about other settings? What if I'de like to change the fov everytime I shoot LG? Or change v_viewheight? We can do the same we did with the sensitivity, the same system. Or, we can take a different approach. Maybe in another blog entry. Are you interested in knowing the different ways you can change the fov for one weapon only? Back to T&T indexnever argue with an idiot. they'll bring you back to their level and then beat you with experience.
Administrator
1266 posts
Registered:
Jan 2006
Sometimes 5 fingers aren't enough. I bet you had situations in the past that you wish you had tentacles to press all the keys you want to Fortunately there's an easy way to rebind the same key to do something different. I call them "Switch keys". What are "Switch" keysI call a switch key a key that is binded to an alias that changes other key's binds (which i call multi-bind keys), and restores them later. The binds in multi-bind keys are changed by the "switch" key. For example, in my cfg the key 4 is a multi bind key. When im playing, it "say_team Get quad". But when im pressing the switch key (the TAB key), it "say_team Get Quad at 32", being 32 the second that quad spawns (it's a timer script, which we will talk in later blogs). When i release TAB, it restores the original "Get Quad" message. What I mean is, the switch key changes the bind of the multi-bind keys, only during the period i'm pressing it. Then when I release the switch key, the binds in multi-bind keys are restored to their original values. I felt the need of using multi-bind keys because i love teamplay, and I would like to have more fingers to be able to send more informative messages to my teammates. So, i started using multi-bind keys. This way, one key can have multiple meanings, and I control that. How to create switch and multi-bind keysHere's an example:
// when the switch is pressed, it binds the keys to the new meaning
alias +switch "con_notifylines 2; +showteamscores; bind SPACE _trick; bind MOUSE2 _packs"
//when the switch is released, the original binds are restored to the same keys
alias -switch "con_notifylines 5; -showteamscores; bind SPACE +jump ; bind MOUSE2 +lg""
(...)
//original binds
bind TAB +switch // the switch key
bind SPACE +jump // the normal space bind
bind MOUSE2 +lg // the normal mouse2 bind
In this example, TAB is the switch key, and SPACE and MOUSE2 are the keys affected by the switch key. The normal binds for space and mouse2 are +jump and shoot lg respectively. When i press the switch key, the following happens: - reduces the notifylines in the console;
- shows the scores;
- binds SPACE to a different alias;
- binds MOUSE2 to a different alias;
When i release the switch key, the following happens: - increases the notifylines in the console to the default value;
- hides the scores;
- binds SPACE back to the original alias;
- binds MOUSE2 back to the original alias;
In the next blog entry we will talk about setting the timer using a Switch key. Can you find these "switches" useful? Post it in the comments! Back to T&T indexnever argue with an idiot. they'll bring you back to their level and then beat you with experience.
Administrator
1266 posts
Registered:
Jan 2006
Powerups play an important role in any fps. Since the dawn of time (1997) players have their own tactics of knowing the respawn times of each one of them. Some used stopwatches, some played a sound that lasted 60 seconds for quad and 5m for penta/ring... Among other creative solutions Later the fps community evolved and gameclock was no longer considered a cheat, so everyone started using it. Even later, around 2006 maybe, someone came up with the idea of using the existing features in ezQuake and made timer scripts. Basically, when the player knows the second that a given powerups spawns, he defines the number he wants to show to teammates, then include it in "say_team get quad at <number>". The number is between 0 and 59 and represents the second that the powerup spawns. The script that I will talk about below is an improvement of the original one. The script is a couple of lines only. The downside of this script is that you can only set one number at a time, and it will only be functional to your teammates if everyone's gameclock counts in the same direction (either up or down) but it is simple to configure. There are more complex scripts in the forum that don't have these disadvantages, but what the hell This is good enough to start. So, I will show you how to use the timer script (below) with a switch key. Before that, let me explain what it does: Most of my multi bind keys are related to the timer script. When i'm pressing the switch key (TAB), the following keys are binded to (the regular bind is in italic): - mouse wheel up -> increases the numeric variable; shoots SG
- mouse wheel down -> decreases the numeric variable; shoots SSG
- 4 -> say_team "Get Quad at <number>"; say_team get Quad
- 5 -> say_team "Get Pent at <number>"; say_team get Pent
- e -> say_team "RL at <number>"; say_team Cancel that
- r -> say_team asks teammates for enemy positions (i use it when i have quad); say_team Coming
Note that 4 and 5 are always related to Quad and Pent respectively. In nowadays timer scripts the mouse wheel is used to set the exact number. With the switch key, you can continue to use the mouse wheel like you always did, but it also can set the timer. I applyed the same logic to the get quad and get pent keys. I added a get RL at <number> as well, as it is crucial in e1m2 for example. And I also added a key to ask for positions. Now, the script. It's a simple script that is available on the forum: set timer 0
alias uptime "if $timer == 59 then set timer 0 else inc timer 1;echo ^t^i^m^e :$timer"
alias downtime "if $timer == 0 then set timer 59 else inc timer -1;echo ^t^i^m^e :$timer"
You can bind these directly to your mouse wheel, but you probably you have something else binded there (that's why i'm gonna show you how to use switch keys). Anyway, here's how: bind MWHEELUP "uptime"
bind MWHEELDOWN "downtime" And of course, its recommended to create your own aliases for simplicity. Something like: alias getquadtimer "say_team $\$nick QUAD on :{$timer}"
alias getpenttimer "say_team $\$nick PENT on :{$timer}"
alias getrltimer "say_team $\$nick RL on :{$timer}"
So there it is, a very simple timer script. How to use this in a switch alias? You got to have a switch alias. To know more, read my last blog entry. Once you have it, you have to modify it to suit your needs. Basically, you got to insure that what you change when you are pressing the (switch) key gets changed back to what it was when you release it.//Press key - add the bold text:
alias +switch "con_notifylines 2; +showteamscores; bind SPACE _trick; bind MOUSE2 _packs;bind 4 "getquadtimer"; bind 5 getpenttimer; bind e getrltimer";bind MWHEELUP uptime; bind MWHEELDOWN downtime;
//Release key: and add your regular binds to the same keys:
alias -switch "con_notifylines 5; -showteamscores; bind SPACE +jump ; bind MOUSE2 +lg; bind 4 _getquad; bind 5 _getpent; bind e _cancel; bind MWHEELUP +sg bind MWHEELDOWN +ssg;"
// the bind for the switch key:
bind TAB +switch
TIP:Always backup your config. If you want to have extra careful when changing it, I recommend creating a separate text file, and place it on /qw folder. Paste the script and the desired binds and aliases to that new text file and save it. Execute nQuake, load your config and join a server (can be localhost - just type map dm6). Execute the text file, typing exec <complete filename>. Now test the changes. If the new aliases behave correctly, save your config with cfg_save. If they don't, quit nQuake and repair what is wrong. This way you config is always secured. So there it is. A simple timer script for any weapon/powerup. There are numerous improvements out there, but this is the basic. Now you know how the enemy team always is at quad when it spawns Back to T&T indexnever argue with an idiot. they'll bring you back to their level and then beat you with experience.
Administrator
1266 posts
Registered:
Jan 2006
T&T#7 USE your keyboard! Ahh, config optmization. I've always liked this part. Today i'm gonna talk about binds placement (keys). After reading this I hope you open your config and take a closer look at your binds, and make some improvements. To motivate you, i'm going to talk about my own binds. This image shows the keys I use regularly: And here are the detailed binds: bind TAB "+showrankings" // switch key
bind SPACE "+jump"
bind 1 "_replace"
bind 2 "_safe"
bind 3 "_lost"
bind 4 "_getquad" // multi bind key
bind 5 "_getpent" // multi bind key
bind 6 "_soon"
bind b "tossrune"
bind c "_waiting"
bind e "_cancel" // multi bind key
bind f "_help"
bind g "_took"
bind h "_trick"
bind j "_trick"
bind q "_sync"
bind r "_coming" // multi bind key
bind t "_trick"
bind u "_sync"
bind v "say_team $\$nick �� quad in 10!"
bind x "_status"
bind y "_slipped"
bind z ".team_powerups"
bind CAPSLOCK "_REPORT"
bind UPARROW "_enemyLocation1"
bind DOWNARROW "_enemyLocation2"
bind LEFTARROW "_enemyLocation4"
bind RIGHTARROW "_enemyLocation5"
bind ALT "+movedown" // to use in water
bind CTRL "_point"
bind LSHIFT "cmd shownick" // teammate information
bind F1 "_packs"
bind F2 "_quad_over"
bind F3 "_enemy_powerups"
bind F4 "_soon"
bind F5 "menu_slist" // server browser
bind WINKEY "_sayUnknownQ"
bind POPUPMENU "_sayUnknownP"
bind MOUSE1 "+rl"
bind MOUSE2 "+lg"
bind MOUSE3 "+gl"
bind MOUSE4 "+sng"
bind MOUSE5 "+rjump"
bind MWHEELUP "mwdw" // multi bind key
bind MWHEELDOWN "mwup" // multi bind key
Notice that: - Alot of keys are used, basically all the keys near my movement keys;
- Capslock, winkey, alt, shift, ctrl and even popupmenu keys are binded;
- In order to use the special keys, you have to type sys_disableWinKeys "1" and cl_keypad "1";
- The "switch" key is very handy, easy to reach. And the multi-bind keys are also handy;
- I shoot all the weapons with the mouse buttons (for more, see T&T#3);
If you open your config now and look at your binds, you might discover that maybe you aren't using every key available. You can improve it. Maybe you can find or replace existent binds and use those "special" keys, like capslock, windows key.... It all comes down to you and what you want to do while playing this amazing game. I hope this text inspired you to analyze your config and make improvements. Will you change your config after reading this? Back to T&T index(Edited 2019-05-22, 09:56)never argue with an idiot. they'll bring you back to their level and then beat you with experience.
Administrator
1266 posts
Registered:
Jan 2006
Today I present you a series of exercises you can do. I do some of them after a long break, I believe they help me bring back my game faster. Even if I�m just an average player, without these exercises I�d be much worse or i would take more time to recover my form. So, here they are. Exercise #1 - 180 degree turn Goal: Fine tune your sensitivity. This exercise will help you find the most comfortable sensitivity for you. Description:I use to do this exercise on the mega room on dm6, when i don't play for a long time. It helps me remember my comfort zone regarding sensitivity, improving my overall aim and movement. Execution:Position yourself carefully on the center of the room, where the rl is. Point to the center of the Megahealth, and in one movement, do 180 degrees rotation, trying to stop at the center of the teleporter, and vice versa. Repeat dozens of times in both directions, with different speeds. While you do it, try to minimize vertical movement. TIP: If you notice that there is unwanted vertical movement, you can try to lower a bit the vertical sensitivity with the command m_pitch. The default value is 0.022, try with 0.020 and see if there's improvements. Exercise #2 - Practice with bots, powerups dmm4 Goal: Practice map movements, Quad attacks with all weapons Description: I love doing this on dm2. I get all quads and try to be there when the quad spawns (practice how much time I take moving from one place to another). Once i get quad, i chase the enemys, using every weapon. Also useful to practice what I call "Quad attitude" - your behaviour should be different when you have Quad. When you have Quad you should either: 1) be extra cautious OR; 2) be extra aggressive. Getting 9 quads in a 10 minutes game will help practice that attitude faster. "Rules": Don't get bored with life; Get all the quads on time; Use all weapons wisely; Avoid getting killed; Take it seriously. How much frags you make isn't important - what is important is to practice situations, especially with quad. But can you do 100 frags in 10min? Execution:In ezQuake go to menu Multiplayer, and then Create. Choose gamemode Teamplay and map frobodm2. type dm until deathmatchmode is 4. addbots, readyup and have fun! If this isn't working, update your nQuake. Download again and copy your config to the new folder.Exercise #3 - DM2 shaft practice Goal: Get used to do small adjustments while you're shafting. Description:This exercise hopefully will improve your reactions while shafting. The goal is to have a high shaft accuracy, while improving the natural adjustments you have to make to keep your crosshair "spot on". Remember, in servers with antilag feature, you don't have any latency when shooting hit scan weapons like LG. Execution:Get a mate to join a ktx server with you. Don't type ready - this exercise is done in prewar. Both go to bigroom, and position yourself facing each other. One of you is the leader, the other will follow - strafing only. Start with smooth movements, using all the terrain you have. Both start to shoot and keep moving, adjusting the crosshair to maintain it on your enemy. Continue for some minutes "dancing" grafully with your mate. You can check your LG accuracy typing /+wp_stats. Everyone should do about 60%-80%. Exercise #4 - Speed and trick jumping Goal: Know which movements make you move faster Description:"Being faster" usually defines the winner in Quakeworld. The combination of acceleration, speed and manoeuvres can often convert a disadvantage situation into a successful dogfight. In this exercise we focus on the little things that enables you to travel faster in the Quake universe You need to add to your hud the "speed" you're travelling. I use hud_speed2_show 1 because since it displays a graphic, it's easier to see your speed increasing with your peripheral vision. Execution:Download the map speed.bsp. Run nQuake and load the map. Type hud_speed2_show 1 and go. Focus on which speed you can acheive with 1 jump, 2 jumps, multiple jumps speed, and watch the speed increasing only when you move your mouse. Here's a list of trick maps: map skill
zediit easy
ztrain easy
ztrain2 easy
bunny_xl easy
trix/trix2 easy
trick medium
trick1 medium
2bfree medium
jqdf1 medium
jqdf2 medium
jqdf3 medium
boostjump medium
v_kjump medium
ztricks medium
zjumps medium
ztricks2 medium
way2ez hard
hoppa2 hard
way2ez2 hard
Enough reading already! 8 blog posts, mostly reading.. you must think "this guy is boring!". I am. Luckly, the qw community is still great and helpful after all these years.  Jisse was so kind to make the following video showing all the exercises I mentioned above. Big thanks to Jisse, who makes high quality productions with apparently little effort Also,  Cara provided the trick jump demos, impressive movements! Keep an eye on the show_speed2 throttle graphic. The remaining demos were recorded by me. Have fun! LINK TO VIDEOBack to T&T indexnever argue with an idiot. they'll bring you back to their level and then beat you with experience.

|
 |
 |
|