|
|
| Line 36: |
Line 36: |
| | </gallery> | | </gallery> |
| | | | |
| − | === Aerowalk Strategy Summary === | + | == How to Play == |
| | + | === 1on1 === |
| | | | |
| − | ==== Introduction ====
| + | Aerowalk favors a fast, rushed strategical and technical approach, has RA, YA, and Mega control points, and favors utilization of teleporters for shot placement. |
| − | An experienced player shares insight into mastering [translate:Aerowalk], a QuakeWorld dueling map. While average on other classic maps, their performance on Aerowalk rivals top players, leading to this guide on psychological and tactical mastery.
| |
| − | | |
| − | ==== The Fundamental Theorem of QuakeWorld ====
| |
| − | Success in QuakeWorld can be summarized as:
| |
| − | * Guess your opponent's actions correctly – you gain.
| |
| − | * Guess incorrectly – you lose.
| |
| − | * When your opponent misreads you – you gain.
| |
| − | * When your opponent predicts you – you lose.
| |
| − | | |
| − | All strategy revolves around this prediction dynamic.
| |
| − | | |
| − | ==== Core Principles ====
| |
| − | * Learn the map deeply to move efficiently and unpredictably.
| |
| − | * Use psychology: anticipate your opponent’s choices and break patterns.
| |
| − | * Speed, versatility, and flexibility lead to control.
| |
| − | * Every consistent behavior can be punished once it becomes predictable.
| |
| − | | |
| − | ==== Strategy vs. Tactics ====
| |
| − | * Strategy: controlling major items and map areas.
| |
| − | * Tactics: actions during direct combat.
| |
| − | Winning requires advantage in both.
| |
| − | | |
| − | ==== Spawn Control ====
| |
| − | QuakeWorld revolves around spawnkills:
| |
| − | * Fight for positions granting the easiest and fastest spawn frags.
| |
| − | * Control spawn zones near key weapons such as the Rocket Launcher and Red Armor.
| |
| − | * Deny your opponent safe spawns or item pickups.
| |
| − | | |
| − | ==== Awareness and Movement ====
| |
| − | * Listen for jumps and item pickups to anticipate opponent actions.
| |
| − | * Avoid obvious routes and patterns—use feints, fakeouts, and switchbacks.
| |
| − | * Move unpredictably to break timing and ambush expectations.
| |
| − | | |
| − | ==== Item and Resource Management ====
| |
| − | * Ammo respawns every 15s; armor and megahealth every 20s.
| |
| − | * Control critical items and deny recovery options to your opponent.
| |
| − | * Attrition—starving your opponent of ammo and health—leads to dominance.
| |
| − | | |
| − | ==== Handling Play Styles ====
| |
| − | ===== Defensive Opponents =====
| |
| − | * They occupy less of the map—use your mobility and item access.
| |
| − | * Control all other resources and exploit their limited area.
| |
| − | * Attack unpredictably to force mistakes.
| |
| − | | |
| − | ===== Aggressive Opponents =====
| |
| − | * Play defensively, avoid direct fights.
| |
| − | * Use splash damage, spam, and area denial.
| |
| − | * Force them into traps and control items through attrition.
| |
| − | | |
| − | ==== Tricks and Techniques ====
| |
| − | * Use weaker weapons to disrupt bunnyhopping momentum (shotgun/nailgun).
| |
| − | * Prioritize Red Armor control; it outweighs combined Yellow Armor + MegaHealth in long-term dominance.
| |
| − | * Rocket jump efficiently from multiple points (YA/MH to RA, MH to upper-RL, etc.).
| |
| − | * Maintain positional advantage—height equals power.
| |
| − | | |
| − | ==== Common Scenarios ====
| |
| − | 1. Opening fight – Prioritize positioning over Mega pickup. Deny opponent access using rockets.
| |
| − | 2. Mega vs RA stalemate – Pressure with spam and containment.
| |
| − | 3. Low health – Move unpredictably and play for survival.
| |
| − | 4. Map control – Time all items; keep pressure with spawnkills.
| |
| − | | |
| − | ==== When Winning or Losing ====
| |
| − | * When losing: Avoid unnecessary deaths, regroup, use ambush tactics.
| |
| − | * When even: Wait for vulnerability; strike decisively.
| |
| − | * When leading: Control the pace, run items, maintain dominance.
| |
| − | | |
| − | ==== Final Advice ====
| |
| − | Learn every jump, every escape, every attack pattern.
| |
| − | Master timing, unpredictability, and awareness.
| |
| − | Victory in Aerowalk comes to the player who understands psychology, prediction, and map flow.
| |
| | | | |
| | {{#ev:youtube|834s5YjMb0U|300}} | | {{#ev:youtube|834s5YjMb0U|300}} |
| | | | |
| | + | === Free for All === |
| | | | |
| | + | Just for fun, used in most ffa rotations. An armored [[Quad]] carrier can really wreak havoc here. |
| | | | |
| | [[Category:Maps]] | | [[Category:Maps]] |
Released:
February 21, 1998
Gametype:
1on1, 2on2, FFA
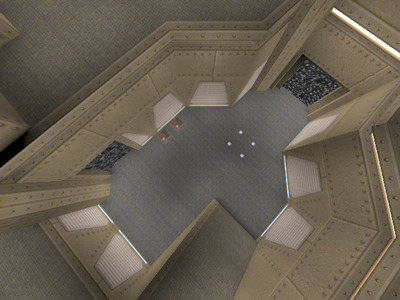
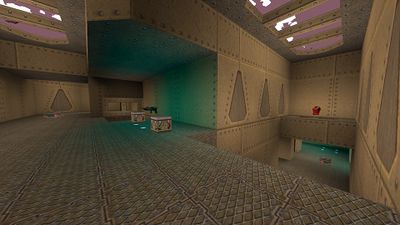
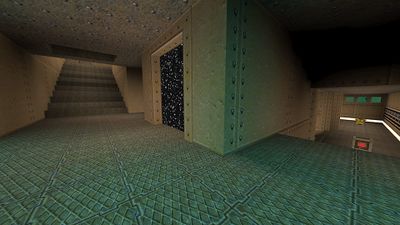
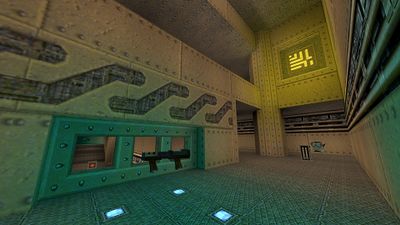
Created and released by  Preacher in February 21, 1998, Aerowalk is one of the two custom maps included in the TB5 pool for 1on1 play alongside Ztndm3. Aerowalk is the most popular of the pair in most regions, but not all — notably in Russia. Due to its wide popularity, it has been ported to many other games. Aerowalk was created using the WorldCraft editor.
Medium sized level especially made for furious 1on1 play =)
— Preacher
| Powerups
|
|
Armor
|
|
Weapons
|
| Quad
|
Ring
|
Pent
|
MH
|
RA
|
YA
|
GA
|
LG
|
RL
|
GL
|
SNG
|
NG
|
SSG
|
| 1
|
0
|
0
|
1
|
1
|
1
|
2
|
1
|
2
|
1
|
2
|
0
|
0
|
Gallery
How to Play
1on1
Aerowalk favors a fast, rushed strategical and technical approach, has RA, YA, and Mega control points, and favors utilization of teleporters for shot placement.
Free for All
Just for fun, used in most ffa rotations. An armored Quad carrier can really wreak havoc here.
Credits
 KemiKal and
  Inqy,
Inqy,  Tomppa,
  Cthulhu,
  Lakerman,
  KrYo,
KrYo,  Gpq.
Gpq.
A special thanks goes out to  Giggler, who's map giggler5 heavily inspired this map.
![]() Preacher in February 21, 1998, Aerowalk is one of the two custom maps included in the TB5 pool for 1on1 play alongside Ztndm3. Aerowalk is the most popular of the pair in most regions, but not all — notably in Russia. Due to its wide popularity, it has been ported to many other games. Aerowalk was created using the WorldCraft editor.
Preacher in February 21, 1998, Aerowalk is one of the two custom maps included in the TB5 pool for 1on1 play alongside Ztndm3. Aerowalk is the most popular of the pair in most regions, but not all — notably in Russia. Due to its wide popularity, it has been ported to many other games. Aerowalk was created using the WorldCraft editor.
![]() KemiKal and
KemiKal and ![]() Inqy,
Inqy, ![]() Tomppa,
Tomppa, ![]() Cthulhu,
Cthulhu, ![]() Lakerman,
Lakerman, ![]() KrYo,
KrYo, ![]() Gpq.
Gpq.![]() Giggler, who's map giggler5 heavily inspired this map.
Giggler, who's map giggler5 heavily inspired this map.


