Difference between revisions of "Dm3"
| (17 intermediate revisions by 5 users not shown) | |||
| Line 1: | Line 1: | ||
| − | {{ | + | {{Infobox map |
| − | | | + | |name=The Abandoned Base |
| − | | | + | |year=1996 |
| − | | | + | |image=dm3.jpg |
| − | | | + | |creator={{player|John "Daikatana" Romero|flag=us|link=false}} |
| − | | | + | |gametype=4on4, Clan Arena, FFA, Wipeout |
| + | |size=Large | ||
| + | |family=[[TB5]] | ||
| + | |download=https://maps.quakeworld.nu/all/dm3.bsp | ||
}} | }} | ||
| − | + | Dm3 is one of the most commonly played maps in Quakeworld. While being the most popular map for clan wars and 4on4 gameplay in general, it is also frequently played on FFA servers and is by far the most dominant map in Clan Arena games. | |
| − | + | ===Items=== | |
| − | == Items == | ||
| − | |||
| − | |||
| − | |||
{{MapItems | {{MapItems | ||
| − | | | + | |quad=1 |
| − | | | + | |ring=1 |
| − | | | + | |pent=1 |
| − | | | + | |hp100=3 |
| − | | | + | |ra=1 |
| − | | | + | |ya=1 |
| − | | | + | |ga= |
| − | | | + | |lg=1 |
| − | | | + | |rl=1 |
| − | | | + | |gl=1 |
| − | + | |sng=1 | |
| − | | | + | |ng=1 |
| − | | | + | |ssg=1 |
| − | | | ||
| − | |||
| − | |||
| − | |||
| − | |||
| − | |||
| − | |||
| − | |||
| − | |||
| − | |||
}} | }} | ||
| + | ==Gallery== | ||
| + | <gallery mode="packed-hover" heights="150px"> | ||
| + | File:Dm3 bridge.jpg | ||
| + | File:Dm3 pent.jpg | ||
| + | File:Dm3 sng.jpg | ||
| + | </gallery> | ||
| − | == | + | == How to Play == |
| − | + | === 4on4 === | |
| − | How | ||
| − | |||
| − | == | ||
| − | |||
| − | |||
| − | |||
| − | |||
| − | |||
| − | |||
| − | |||
| − | |||
| − | [ | + | ([http://www.quakeworld.nu/forum/viewtopic.php?id=2327 Credits]: ui) |
| − | + | As the game starts, hold back+strafe-left. This way, if you spawn at either Yellow Armor or lifts, you will have a decent shot at getting the Pent (the most powerful powerup on the map). If you get the Pent, you have two options - if you spawned at Yellow Armor, go directly to the Rocket Launcher and stand on the spawnpoint there, hopefully you will get one or two frags while you're waiting for the Rocket Launcher to spawn. If you didn't get the Yellow Armor, go for it first, then take the teleporter and from the exit jump around the corner and continue on to the Rocket Launcher (If you can't do this jump or don't want to risk it, just use the catwalk). MAKE SURE you get there a few seconds before the next Rocket Launcher spawn or you risk losing it to the enemy! | |
| − | + | A third option is available if you spawn at Yellow Armor and get the Pent, and the enemy spawns at the Rocket Launcher. There is a chance he'll head for the next Yellow Armor spawn, in which case you should stand on the teleporter exit by window, and then have your mates flood the Yellow Armor box. Hopefully he will retreat through the teleporter and end up being deflected by Satan's power! If this works out, you will have 150Y, RL and pent! \o/ <br><br> | |
| − | |||
| − | |||
| − | |||
| − | + | He who spawns at Rocket Launcher should go for the next Yellow Armor if the Pent guy got it (you'll know, because the mate who got the pent will report this and also his armor status). If the Pent guy didn't get it (there's a 50/50 chance) you better get away from there, so move on towards the Red Armor and try to snatch it from whoever's holding the area. In the Red Armor room there are also 5 rockets (with another 5 right outside, next to ring), so you should be able to hold it until your mates arrive. Then STAY there and make sure at least one mate gets the Red Armor, and is able to defend it. Having Red Armor and a simple shotgun is NOT sufficient firepower for the task.<br><br> | |
| − | |||
| − | + | If you spawn at SNG-Tele, quickly go through the teleporter and grab the Ring, and then the Quad. If you spawn at SNG-tele with a teammate, make sure one of you does not grab both the Ring and the Quad - this is a complete waste of the Ring! It's much better that you grab the Ring and try to secure the first Red Armor - this is often quite easy, either just make a run for it and grab it as quickly as possibly, or sneak up to the top. If there's an enemy ahead of you, shoot him while you're moving upwards. Hopefully this will distract him enough to make him fall, in which case you can just run for the armor.<br><br> | |
| − | |||
| − | + | Yellow Armor can be quite easily defended by standing halfway up the stairs. From here you can shoot along the catwalk towards the Quad area, and you can also be on the watch for people coming around the corner from water. Be mindful of the spawn that is right next to the Yellow Armor - safeguard it every 20 seconds (when the armor is about to spawn) by standing inside the little box. Do not shoot at the spawn point unless you are positive no teammates just died! From Yellow Armor, attempts can be launched for the Quad - be mindful that the enemy might be standing at window, waiting for this to happen. You can also split up, two people can go through the teleporter, and two follow the catwalk towards the Quad. This way you'll catch any eventual Quad defenders in a crossfire.<br><br> | |
| − | + | When the time comes to grab the Pent, you'll want to make a sweep of the entire outdoor area. An enemy could be hiding behind the wall between the water and Mega. Also, people can easily hide in the lifts, popping out two seconds before the Pent spawns. The optimal solution is having one or two guys standing by the window, and one waiting by the lifts. Don't linger more than absolutely necessary by the Pent - you are a sitting duck when in the open. Attempts at the Pent can be made from the water - it is possible to sit just beneath the surface and then jump out seconds before the Pent spawns. Protect yourself against this by shooting one or two rockets on the wall next to the steps in the water about 5 seconds before the Pent spawns.<br><br> | |
| − | + | If the Quad is delayed in such a way that the Pent spawns around 25 seconds before, it is possible to guard the Pent until a few seconds remain before the Quad spawn. This way, you will have a great shot at getting maybe 20-25 seconds with both Quad and Pent. This is only advisable in a situation where you can ascertain the security of the area - do NOT dwell next to it if enemies are coming and you can't fend them off!<br><br> | |
| − | + | The Quad guy should strive to get control of the Red Armor room if it's not completely bogged down with stacked enemies. If this is the case, all efforts should be made to seize control by flooding the room from multiple entrances. Make sure the guy who has Quad isn't the first to enter the room, as the point man is likely to catch a load of rockets the moment he enters. A player with Mega, Yellow Armor, Quad and Lightning Gun can clear out the room in just a few seconds unless he dies entering it. There's plenty of space for maneuvering down on the floor, and people on the catwalks are very exposed to fire.<br><br> | |
| − | + | Getting the Quad is basically a matter of being there at the right time and with the right equipment. An effort should be made to get the player with the most armor and at least one decent weapon (Rocket Launcher or Lightning Gun) to be the quadrunner. If this is impossible, it's better to have an armored player with a less powerful weapon than having an unarmored guy run around with a quadded Rocket Launcher. Make sure you tell the quadrunner where he needs to be - stuff like "two weak enemies at YA" can mean the difference between loss and victory if the quadrunner can properly execute an attack in a timely fashion. Spending 30 seconds of quad time running around in circles looking for someone to shoot is EXTREMELY bad. If you just don't know what to do, going to the Red Armor is a good idea more often than not.<br><br> | |
| − | + | There are some moves that everyone should be able to execute. Perhaps the most important of all is the rocketjump from Pent to window. This can be done in a number of ways; either, take the lifts up to the first level and then do a simple rocketjump up to the window. Alternatively, shoot a grenade straight up right beneath the window, and make a rocketjump straight up when the grenade explodes, (you can easily get the timing right by jumping when the grenade touches the ground for the second time). It is an absolute necessity that everyone knows how to make this jump in one way or another, since it is important to use the precious 30 seconds of invulnerability in the most efficient way possible.<br><br> | |
| − | + | Another fundamental jump on Dm3 is the curling jump around corners above hill, from Ring to Quad and vice versa. Methodology of strafejumping and curling will not be detailed here; if you are unfamiliar with the different aspects of speedjumping, it is suggested that you check out the demos that are included within the ezquake package. | |
| − | + | ===More jumps=== | |
| − | + | * from one side of the RA room to another, i.e. from one catwalk to the other - this decreases the time it takes to reach the Red Armor<br> | |
| + | * from SNG-ledge to SNG (jump out to the left right when you reach the top of the stairs, and aim for the little ledge protruding from the boxes) - this way you can beat an enemy to the SNG, or possibly even kill him coming from an unexpected angle<br> | ||
| + | * from bridge-high to rl-window (a quick way to get the Rocket Launcher) - if you need an extra boost, jump down the stairs from the window, jump at the bottom of the stairs and curl around the corner<br> | ||
| + | * from the water beneath rl-window up to the rl-window. this one takes practice; what you need to do is the following: | ||
| + | ** be right beneath the window, submerged a bit | ||
| + | ** aim straight down, turned away from the window, this way you'll stick close to the wall | ||
| + | ** press +back and +jump so you start ascending quickly | ||
| + | ** EXACTLY when you break the surface, turn around 180 degrees, and fire a rocket into the wall right beneath you | ||
| + | ** When properly executed, this will land you on the ledge of the rl-window, and you will have a decent shot at anyone camping there, or you'll just end up with a grenade up your ass, but hey, that's life...<br> | ||
| − | + | ===Some other tricks=== | |
| − | + | * It is possible to actually float around in the water and shoot LG without discharging. If you keep +jump pressed in and move about without ever looking down, you'll be safe (but there is still a risk that someone will shoot you, which might send you back and down)<br> | |
| − | + | * Discharging the enemy quad is always fun.<br> | |
| − | + | * When you're waiting for the quad, send a couple of grenades around the corner towards window. This will protect you from any nasty surprises. Also, consider shooting rockets at the entrance to the Red Armor room, since any enemies coming from there are likely to be stacked.<br> | |
| − | + | * Generally when fighting above hill (quad and ring areas), deter enemies by jumping across to the other side and then spray the route you just took with nails. If someone tries to follow you, they'll get hit by nails which will slow them enough to make them fall down.<br> | |
| − | + | * Stand beneath the hole in the ceiling at sng-ledge. Here you can get the occasional spawnkill, just make sure you're not shooting at your friend. Also, you can clear out most of the lifts by lobbing grenades up here in the right angle.<br> | |
| − | + | * Stand 'behind' the teleporter exit at window and wait for someone to pop out of it. When they do, they will be facing the water and you can get a free shot with the Lightning Gun, Super Nailgun or Super Shotgun. If you have quad, do NOT explosives here.<br> | |
| − | + | * When defending Red Armor room, shoot grenades randomly into the different entrances to the room. By standing on the ledge right beneath the Red Armor platform, you can place grenades very closely to the teleporter exit.<br> | |
| − | + | * It's possible to reach the topmost level of the Red Armor catwalks with a rocketjump from the ledge at the entrance. With proper training it's not even hard to fit in the space between the catwalk and the wall. With some more training, you can make the jump all the way up to the Red Armor by shooting a second rocket into the wall on your way up.<br> | |
| − | + | * Play hide-and-seek in the Red Armor room if you have the Ring. It has been known for as much as three armored enemies to be taken out by one player with just Ring and Grenade Launcher, just by jumping around randomly and shooting along the catwalks.<br><br> | |
| − | + | ==== Spawns / Openers ==== | |
| − | + | [[File:DM3 spawns 20190426-2112.png|800px|none|Common DM3 openers per spawn point]] | |
| − | |||
| − | |||
| − | |||
| − | |||
| − | |||
| − | |||
| − | |||
| − | |||
=== Clan Arena === | === Clan Arena === | ||
| − | |||
Probably the best CA map ever made. | Probably the best CA map ever made. | ||
=== Free for All === | === Free for All === | ||
| − | |||
Good map for FFA as well. | Good map for FFA as well. | ||
| − | + | == Romeros original sketches == | |
| − | == | + | [[File:Dm3-original-sketch.jpg|800px]] |
| − | |||
| − | |||
| − | |||
| − | |||
| − | |||
[[Category:Maps]] | [[Category:Maps]] | ||
[[Category:4on4 Maps]] | [[Category:4on4 Maps]] | ||
Latest revision as of 11:30, 20 March 2024
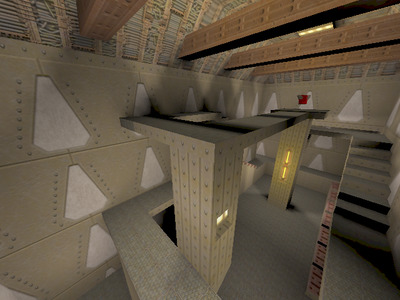
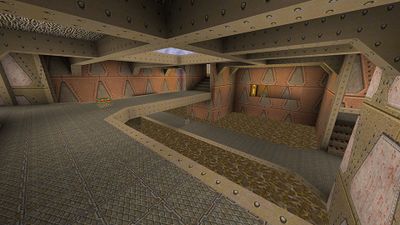
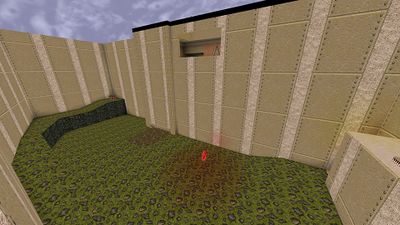
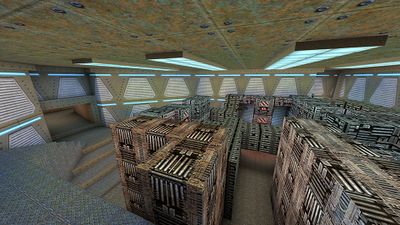
Dm3 is one of the most commonly played maps in Quakeworld. While being the most popular map for clan wars and 4on4 gameplay in general, it is also frequently played on FFA servers and is by far the most dominant map in Clan Arena games.
Items
| Powerups | Armor | Weapons | ||||||||||||
|---|---|---|---|---|---|---|---|---|---|---|---|---|---|---|
| Quad | Ring | Pent | MH | RA | YA | GA | LG | RL | GL | SNG | NG | SSG | ||
| 1 | 1 | 1 | 3 | 1 | 1 | 0 | 1 | 1 | 1 | 1 | 1 | 1 | ||
Gallery
How to Play
4on4
(Credits: ui)
As the game starts, hold back+strafe-left. This way, if you spawn at either Yellow Armor or lifts, you will have a decent shot at getting the Pent (the most powerful powerup on the map). If you get the Pent, you have two options - if you spawned at Yellow Armor, go directly to the Rocket Launcher and stand on the spawnpoint there, hopefully you will get one or two frags while you're waiting for the Rocket Launcher to spawn. If you didn't get the Yellow Armor, go for it first, then take the teleporter and from the exit jump around the corner and continue on to the Rocket Launcher (If you can't do this jump or don't want to risk it, just use the catwalk). MAKE SURE you get there a few seconds before the next Rocket Launcher spawn or you risk losing it to the enemy!
A third option is available if you spawn at Yellow Armor and get the Pent, and the enemy spawns at the Rocket Launcher. There is a chance he'll head for the next Yellow Armor spawn, in which case you should stand on the teleporter exit by window, and then have your mates flood the Yellow Armor box. Hopefully he will retreat through the teleporter and end up being deflected by Satan's power! If this works out, you will have 150Y, RL and pent! \o/
He who spawns at Rocket Launcher should go for the next Yellow Armor if the Pent guy got it (you'll know, because the mate who got the pent will report this and also his armor status). If the Pent guy didn't get it (there's a 50/50 chance) you better get away from there, so move on towards the Red Armor and try to snatch it from whoever's holding the area. In the Red Armor room there are also 5 rockets (with another 5 right outside, next to ring), so you should be able to hold it until your mates arrive. Then STAY there and make sure at least one mate gets the Red Armor, and is able to defend it. Having Red Armor and a simple shotgun is NOT sufficient firepower for the task.
If you spawn at SNG-Tele, quickly go through the teleporter and grab the Ring, and then the Quad. If you spawn at SNG-tele with a teammate, make sure one of you does not grab both the Ring and the Quad - this is a complete waste of the Ring! It's much better that you grab the Ring and try to secure the first Red Armor - this is often quite easy, either just make a run for it and grab it as quickly as possibly, or sneak up to the top. If there's an enemy ahead of you, shoot him while you're moving upwards. Hopefully this will distract him enough to make him fall, in which case you can just run for the armor.
Yellow Armor can be quite easily defended by standing halfway up the stairs. From here you can shoot along the catwalk towards the Quad area, and you can also be on the watch for people coming around the corner from water. Be mindful of the spawn that is right next to the Yellow Armor - safeguard it every 20 seconds (when the armor is about to spawn) by standing inside the little box. Do not shoot at the spawn point unless you are positive no teammates just died! From Yellow Armor, attempts can be launched for the Quad - be mindful that the enemy might be standing at window, waiting for this to happen. You can also split up, two people can go through the teleporter, and two follow the catwalk towards the Quad. This way you'll catch any eventual Quad defenders in a crossfire.
When the time comes to grab the Pent, you'll want to make a sweep of the entire outdoor area. An enemy could be hiding behind the wall between the water and Mega. Also, people can easily hide in the lifts, popping out two seconds before the Pent spawns. The optimal solution is having one or two guys standing by the window, and one waiting by the lifts. Don't linger more than absolutely necessary by the Pent - you are a sitting duck when in the open. Attempts at the Pent can be made from the water - it is possible to sit just beneath the surface and then jump out seconds before the Pent spawns. Protect yourself against this by shooting one or two rockets on the wall next to the steps in the water about 5 seconds before the Pent spawns.
If the Quad is delayed in such a way that the Pent spawns around 25 seconds before, it is possible to guard the Pent until a few seconds remain before the Quad spawn. This way, you will have a great shot at getting maybe 20-25 seconds with both Quad and Pent. This is only advisable in a situation where you can ascertain the security of the area - do NOT dwell next to it if enemies are coming and you can't fend them off!
The Quad guy should strive to get control of the Red Armor room if it's not completely bogged down with stacked enemies. If this is the case, all efforts should be made to seize control by flooding the room from multiple entrances. Make sure the guy who has Quad isn't the first to enter the room, as the point man is likely to catch a load of rockets the moment he enters. A player with Mega, Yellow Armor, Quad and Lightning Gun can clear out the room in just a few seconds unless he dies entering it. There's plenty of space for maneuvering down on the floor, and people on the catwalks are very exposed to fire.
Getting the Quad is basically a matter of being there at the right time and with the right equipment. An effort should be made to get the player with the most armor and at least one decent weapon (Rocket Launcher or Lightning Gun) to be the quadrunner. If this is impossible, it's better to have an armored player with a less powerful weapon than having an unarmored guy run around with a quadded Rocket Launcher. Make sure you tell the quadrunner where he needs to be - stuff like "two weak enemies at YA" can mean the difference between loss and victory if the quadrunner can properly execute an attack in a timely fashion. Spending 30 seconds of quad time running around in circles looking for someone to shoot is EXTREMELY bad. If you just don't know what to do, going to the Red Armor is a good idea more often than not.
There are some moves that everyone should be able to execute. Perhaps the most important of all is the rocketjump from Pent to window. This can be done in a number of ways; either, take the lifts up to the first level and then do a simple rocketjump up to the window. Alternatively, shoot a grenade straight up right beneath the window, and make a rocketjump straight up when the grenade explodes, (you can easily get the timing right by jumping when the grenade touches the ground for the second time). It is an absolute necessity that everyone knows how to make this jump in one way or another, since it is important to use the precious 30 seconds of invulnerability in the most efficient way possible.
Another fundamental jump on Dm3 is the curling jump around corners above hill, from Ring to Quad and vice versa. Methodology of strafejumping and curling will not be detailed here; if you are unfamiliar with the different aspects of speedjumping, it is suggested that you check out the demos that are included within the ezquake package.
More jumps
- from one side of the RA room to another, i.e. from one catwalk to the other - this decreases the time it takes to reach the Red Armor
- from SNG-ledge to SNG (jump out to the left right when you reach the top of the stairs, and aim for the little ledge protruding from the boxes) - this way you can beat an enemy to the SNG, or possibly even kill him coming from an unexpected angle
- from bridge-high to rl-window (a quick way to get the Rocket Launcher) - if you need an extra boost, jump down the stairs from the window, jump at the bottom of the stairs and curl around the corner
- from the water beneath rl-window up to the rl-window. this one takes practice; what you need to do is the following:
- be right beneath the window, submerged a bit
- aim straight down, turned away from the window, this way you'll stick close to the wall
- press +back and +jump so you start ascending quickly
- EXACTLY when you break the surface, turn around 180 degrees, and fire a rocket into the wall right beneath you
- When properly executed, this will land you on the ledge of the rl-window, and you will have a decent shot at anyone camping there, or you'll just end up with a grenade up your ass, but hey, that's life...
Some other tricks
- It is possible to actually float around in the water and shoot LG without discharging. If you keep +jump pressed in and move about without ever looking down, you'll be safe (but there is still a risk that someone will shoot you, which might send you back and down)
- Discharging the enemy quad is always fun.
- When you're waiting for the quad, send a couple of grenades around the corner towards window. This will protect you from any nasty surprises. Also, consider shooting rockets at the entrance to the Red Armor room, since any enemies coming from there are likely to be stacked.
- Generally when fighting above hill (quad and ring areas), deter enemies by jumping across to the other side and then spray the route you just took with nails. If someone tries to follow you, they'll get hit by nails which will slow them enough to make them fall down.
- Stand beneath the hole in the ceiling at sng-ledge. Here you can get the occasional spawnkill, just make sure you're not shooting at your friend. Also, you can clear out most of the lifts by lobbing grenades up here in the right angle.
- Stand 'behind' the teleporter exit at window and wait for someone to pop out of it. When they do, they will be facing the water and you can get a free shot with the Lightning Gun, Super Nailgun or Super Shotgun. If you have quad, do NOT explosives here.
- When defending Red Armor room, shoot grenades randomly into the different entrances to the room. By standing on the ledge right beneath the Red Armor platform, you can place grenades very closely to the teleporter exit.
- It's possible to reach the topmost level of the Red Armor catwalks with a rocketjump from the ledge at the entrance. With proper training it's not even hard to fit in the space between the catwalk and the wall. With some more training, you can make the jump all the way up to the Red Armor by shooting a second rocket into the wall on your way up.
- Play hide-and-seek in the Red Armor room if you have the Ring. It has been known for as much as three armored enemies to be taken out by one player with just Ring and Grenade Launcher, just by jumping around randomly and shooting along the catwalks.
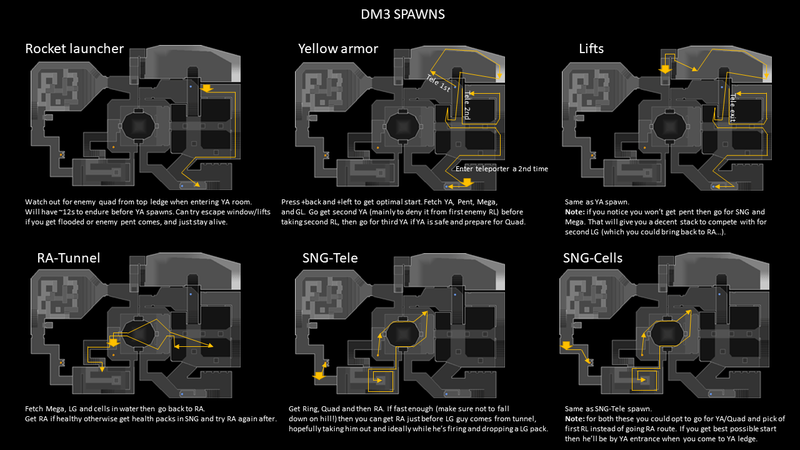
Spawns / Openers
Clan Arena
Probably the best CA map ever made.
Free for All
Good map for FFA as well.
